Powermatic 66 User Manual
Browse online or download User Manual for Power saws Powermatic 66. Powermatic 66 User Manual
- Page / 40
- Table of contents
- TROUBLESHOOTING
- BOOKMARKS
- 10-inch Table Saw 1
- Warranty and Service 2
- Table of Contents 3
- Warning 4
- Introduction 6
- Specifications 6
- Unpacking 7
- Installation and Assembly 8
- Installing Blade 9
- Splitter and Guard Assembly 9
- Grounding Instructions 10
- Adjustments 11
- Tilt Stop Adjustment 12
- Miter Gauge Adjustment 12
- Belt Tensioning 12
- Adjustment 13
- Splitter Alignment 13
- Insert Adjustment 13
- Blade Raising Mechanism 13
- Operating Instructions for 14
- Table Saws 14
- Rip Sawing 16
- Resawing 17
- Crosscutting 17
- Bevel and Miter Operations 18
- Dado Cutting 19
- Safety Devices 19
- Maintenance 20
- Figure 40 21
- Troubleshooting 22
- Optional Accessories 23
- Replacement Parts 23
- Trunnion Assembly 26
- Parts List: Miter Gauge 27
- Parts List: Stand Assembly 30
- Electrical Connections 33
- Maintenance Checklist 37
- 2420 Vantage Drive 40
- Elgin, Illinois 60123 40
- Phone: 800-274-6848 40
Summary of Contents
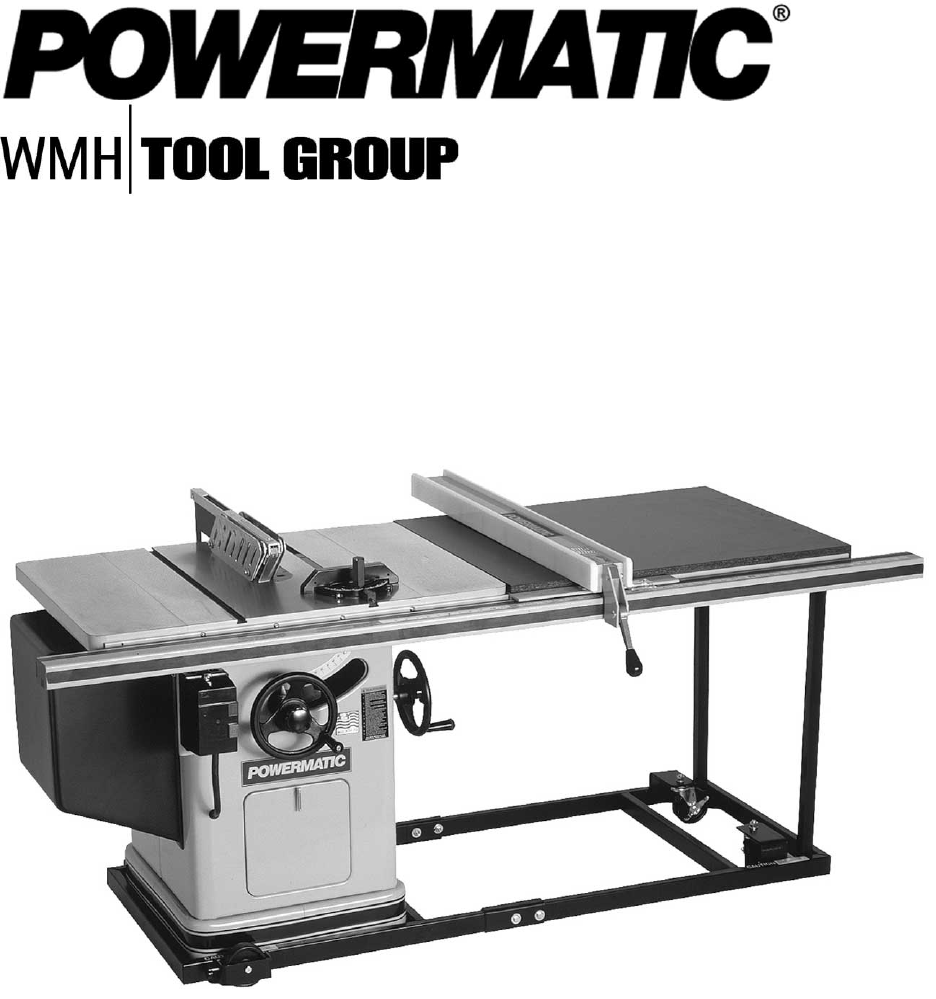
Operating Instructions and Parts Manual 10-inch Table Saw Model 66 shown with optional extension table and legs, mobile base, and motor cover
102. With a 3/8" wrench, reach through the motor opening in the stand and tighten the square head setscrew (A, Figure 8) into the groove of the
11Make sure the voltage of your power supply matches the specifications on the motor plate of the machine. Extension Cords If an extension cord is ne
125. The blade must be kept centered with the slot in the table insert to ensure clearance at both the 90 degree and 45 degree positions. After ali
13Splitter Alignment One of the most critical adjustments to help avoid kickback is the splitter adjustment. It should be checked and readjusted, if
14If the saw raising arm has been re-located, the table may have to be realigned so as to provide clearance between the saw blade and table insert sl
15• Applying feed force when ripping to the cutoff (free) section of the work piece instead of the section between the saw blade and fence. • Rippi
16 9. Bevel ripping cuts should always be made with the fence on the right side of the saw blade so that the blade tilts away from the fence and min
176. Never push in a location such that the pushing hand is in line with the blade. Move the hand serving as a hold-down a safe distance from the bl
18 3. For 90 degree crosscutting, most operators prefer to use the left-hand miter gauge slot. When using it in this position, hold the workpiece ag
19NOTE: When making compound miters (with blade tilted) use the miter gauge in the right hand slot to provide more hand clearance and safety. 3. Ha
2 This manual has been prepared for the owner and operators of a Powermatic 66 Table Saw. Its purpose, aside from machine operation, is to promote sa
20Alternatively, drilled and tapped holes in the table top allow the use of wing nuts and washers as a method of clamping. If this method of fastenin
21 Figure 40
22Troubleshooting Trouble Probable Cause Remedy Tilt or raising clamp knobs not tightened. Tighten knobs. Blade out of balance. Change blade. [page
23Optional Accessories 709689 Scoring Saw attachment retrofit kit. 2042335 Mobile base extended for Model 66 Saw (closed stand). 2042336 Mobile ba
24Parts List: Trunnion Assembly Index No. Part No. Description Size Qty ...2810012... Trunnion Assembly (Items 1 thr
25Index No. Part No. Description Size Qty 58...3530006... Nut ...
26Trunnion Assembly
27Parts List: Miter Gauge Index No. Part No. Description Size Qty ...2471015... Mitre Gauge Assembly (Items 1 Thru 1
28 Parts List: Splitter and Guard Assembly Index No. Part No. Description Size Qty ...2787008... Splitter Rear Suppo
29Splitter and Guard Assembly
3 Table of Contents Warranty and Service ...
30Parts List: Stand Assembly Index No. Part No. Description Size Qty 1...6716031... Hex Head Screw...
31Stand Assembly
32Parts List: Table Extension and Legs (Optional Accessory) Index No. Part No. Description Size Qty ...2389003... Ex
33Electrical Connections
34
35
37 Maintenance Checklist Model 66 Table Saw These should be performed monthly, or more frequently if needed: [ ] Inspect entire machine for loos
38NOTES
4 Warning 1. Read and understand the entire owners manual before attempting assembly or operation. 2. Read and understand the warnings posted on t
40 WMH Tool Group 2420 Vantage Drive Elgin, Illinois 60123 Phone: 800-274-6848 www.wmhtoolgroup.com
5 blahblahblah 20. Keep visitors a safe distance from the work area. Keep children away. 21. Make your workshop child proof with padlocks, master sw
6 Introduction This manual is provided by WMH Tool Group covering the safe operation and maintenance procedures for a Powermatic Model 66 Table Saw.
7 Unpacking Open shipping container and check for shipping damage. Report any damage immediately to your distributor and shipping agent. Do not disca
8 Installation and Assembly Tools required for assembly: 7/16, 9/16, 3/8 and 1/2” wrenches 1/8 and 3/32” hex wrenches Flat head screwdriver Hammer an
9 3. Level the extension wing with the saw table across its entire width, using a straight edge and hammer with block of wood (or rubber hammer). S
Related products and manuals for Power saws Powermatic 66
 (2 pages)
(36 pages)
(48 pages)
(44 pages)
(6 pages)
(2 pages)
(2 pages)
(36 pages)
(48 pages)
(44 pages)
(6 pages)
© 2020, manymanuals.com. All rights reserved. | 3.645 s |
 Manymanuals.com
 Manymanuals.de
 Manymanuals.fr
 Manymanuals.it
 Manymanuals.pl
 Manymanuals.cz
 Manymanuals.es
 Manymanuals-pt.com
Comments to this Manuals